

Installing presets is one of the simplest ways to streamline your creative workflow and achieve consistent, professional results. Whether you are working with photo editing software, music production tools, or video editing applications, presets act as ready-made settings that save you time and effort. Instead of starting from scratch each time, you can apply a preset to instantly replicate a specific style, tone, or effect.
Presets are essentially pre-configured adjustments created by experts or tailored by you for reuse. In photography, they can transform raw images with just one click, ensuring a cohesive color palette and mood across an entire collection.
What Are Presets?
Presets are ready-made configurations that store specific adjustments for reuse. They can be applied across various creative tools:
- Photography: Presets store editing adjustments, such as exposure, contrast, color grading, and tone curves. Applying them instantly transforms the look and feel of photos.
- Music Production: Presets save equalizer settings, reverb, delay, and synthesizer tones to achieve polished, repeatable audio results.
- Video Editing: Presets include filters, transitions, and grading settings that deliver cinematic visuals without manual tweaking.
- Graphic Design: Presets simplify repetitive tasks, such as creating layer styles, applying brushes, and using effects.
By using presets, creators save valuable time while maintaining consistency across their work.
Benefits of Using Presets
Presets offer both practical and creative benefits:
- Speed: Apply professional looks in seconds.
- Versatility: One preset can be applied to hundreds of files.
- Accuracy: Avoid human error by relying on pre-tested configurations.
- Accessibility: Even beginners can produce high-quality results.
- Customization: Presets are flexible, allowing you to adjust them after application.
- Scalability: Ideal for professionals handling large-scale projects, such as weddings, events, or corporate shoots.
Step-by-Step: How to Install Presets?
The installation process varies depending on the software you use, but the steps are generally straightforward. Below are examples for popular platforms:
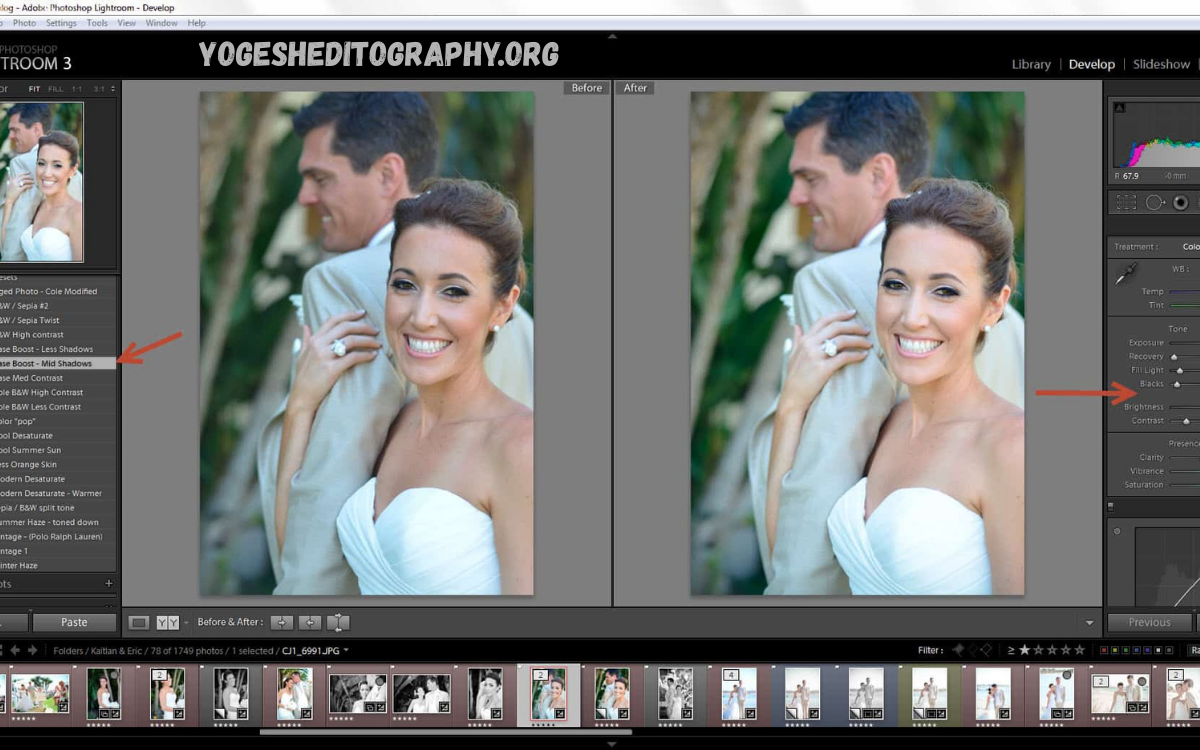
Installing Presets in Adobe Lightroom (Classic)
- Download and unzip your preset files.
- Open Lightroom and go to the Develop module.
- On the left panel, find the Presets section.
- Click the + icon and select Import Presets.
- Navigate to your preset folder and select the files (.xmp).
- Your presets will now appear in the sidebar.
Installing Presets in Adobe Lightroom (Mobile)
- Transfer preset files (.dng) to your phone.
- Open Lightroom Mobile and import the DNG files.
- Open each file, tap the three-dot menu, and select “Create Preset.”
- Save with a name, and it will appear in your Presets section.
Installing Presets in Adobe Photoshop (Camera Raw)
- Open Photoshop and load a RAW file.
- When Camera Raw opens, go to the Presets panel.
- Click the menu icon and select Import Profiles & Presets.
- Choose your downloaded .xmp files.
- Your presets will now appear in the Presets panel.
Installing Presets in Music Production Software
- Ableton Live: Drag preset files into the User Library folder.
- FL Studio: Copy preset files into the Presets directory and reload the software.
- Logic Pro: Save presets into the Plug-in Settings folder.
Installing Presets in Video Editing Software
- Adobe Premiere Pro: Import preset files (.prfpset) via the Effects panel.
- Final Cut Pro: Copy presets into the Motion Templates folder.
Regardless of software, the general rule is to import the preset files into the program’s designated presets or templates folder, after which they can be accessed instantly.
Read Also: Professional Editing Presets for Lightroom & Snapseed
Premium Photography Presets for Stunning Social Media Content
Best Free Presets of 2025 – Elevate Your Creativity Without Cost
Video Editing for Beginners – A Comprehensive Guide to Mastering the Basics
Mastering Video Transitions & Effects
How to Use Presets Effectively?

How to Use
Installing presets is only the first step. Using them effectively ensures you achieve the best results.
- Apply, Then Adjust
Presets are starting points. Fine-tune exposure, saturation, or contrast to match your specific project. - Organize Presets
Keep your library organized by style (e.g., black & white, cinematic, warm tones). - Match Presets to Content
Not every preset is compatible with every file. Test and choose the most suitable one. - Avoid Overuse
Over-reliance on presets can make work look generic. Use them to enhance, not replace, creativity.
How to Get Free Presets?
Many platforms offer free presets. While premium options often provide higher quality, free presets are an excellent way to experiment. Here’s how to find them without relying on links:
- Creative Communities: Many forums and online groups share free presets created by fellow designers.
- Photography Blogs: Professional photographers often release free starter packs as part of their tutorials.
- Software Communities: Platforms like Adobe, FL Studio, and Ableton have user forums where creators share presets.
- Educational Platforms: Some online courses provide free presets as learning tools.
When downloading free presets, always ensure they come from reliable sources to avoid corrupted files or compatibility issues.
Importance of Presets
Presets are not just convenient, they are transformative. Here’s why they are essential in creative industries:
Creative Inspiration
Applying a new preset can spark creativity by showing you possibilities you may not have explored manually.
Consistency Across Projects
For photographers, applying the same preset across a wedding album ensures a cohesive style. For video editors, it maintains a film’s visual unity.
Time-Saving Efficiency
Instead of repeating the same adjustments for every project, presets allow creators to apply complex settings instantly.
Professional Quality
Many presets are designed by industry experts. Using them elevates your work to a professional level, even if you’re a beginner.
Learning Tool
Beginners can study presets to understand how adjustments impact the final output. This accelerates learning curves in software like Lightroom, Photoshop, or Premiere Pro.
Tips for Choosing the Right Presets
- Define Your Style: Choose presets that align with your creative goals (e.g., vintage tones, cinematic colors, moody edits).
- Check Compatibility: Ensure the preset format is compatible with your software version.
- Test Before Bulk Use: Apply to a single file before processing in batches.
- Look for Editable Presets: Flexible presets allow post-application customization.
- Balance Free and Paid Options: Free presets are great for experimentation, while premium presets offer professional-grade results.
The Future of Presets
With AI-powered editing tools, presets are evolving. Modern presets can now adapt automatically based on the content of your file, providing even smarter and more dynamic adjustments. For creative professionals, this means less time spent tweaking and more time focusing on storytelling and artistry.
Frequently Asked Questions
Can I create my own presets?
Yes. Most editing software allows you to save your own adjustments as presets, making them reusable for future projects.
Do presets work on all photos or videos?
Not always. A preset may need tweaking depending on lighting, colors, or overall file quality. They are starting points, not final solutions.
Will presets make my work look unoriginal?
Not if used correctly. Presets provide a foundation, but adding personal adjustments ensures your style remains unique.
Can presets slow down my computer or software?
No, presets are lightweight files. However, applying many effects at once or using complex effects on large projects may negatively impact performance.
Are presets worth investing in?
Yes. Presets save time, improve consistency, and often elevate quality. For professionals handling bulk projects, they are invaluable.
Conclusion
Presets are far more than shortcuts; they are powerful, creative tools that improve efficiency, consistency, and quality. By learning how to install and use them effectively, creators can save time, elevate their projects, and explore new creative directions.